How to setup Farsi input in Mac OS X 10.3 (Panther)
The following instructions are for implementing Farsi support within Mac OS X 10.3. These instructions are provided by Neema Aghamohammadi and if you have any questions you can contact him at ubern_at_mac-dot-com .
A full installation will have the Farsi fonts installed already. If you did not include “Additional Asian Fonts” as part of the installation, you must install those before proceeding with the following steps.
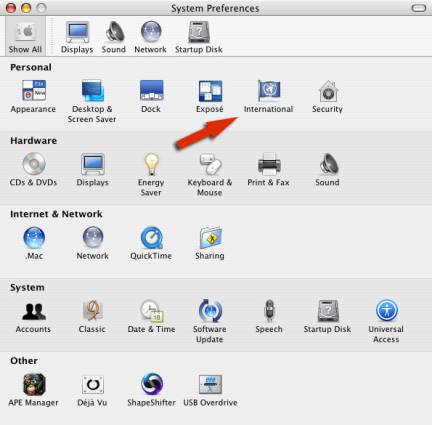
The first step is to open the System Preferences from the Apple menu or from your Dock. This window should open up.
Select the International panel.
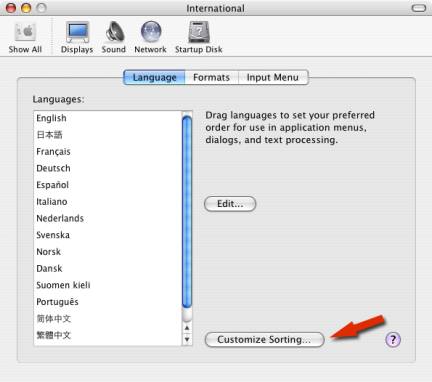
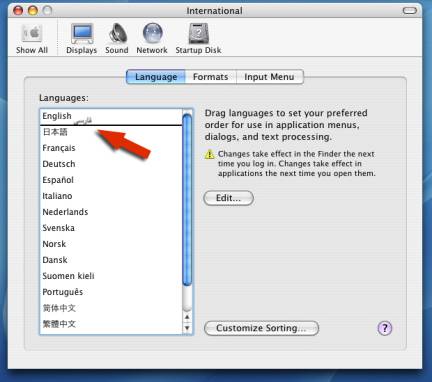
The window will change to the one below. It displays the languages enabled by default in the standard installation of 10.3.
Click on the “Customize Sorting…” button.
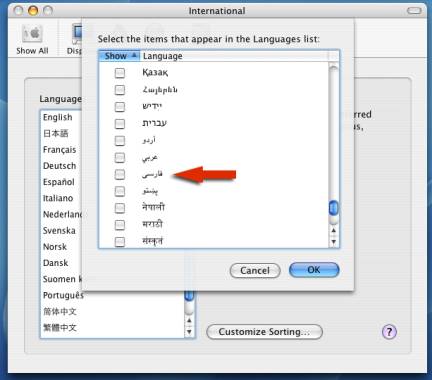
The following dialog window will drop in from the top of the previous window. Scroll down until you see “Farsi.” Enable Farsi (and any other languages you may wish to use). Click on “OK” when you are done.
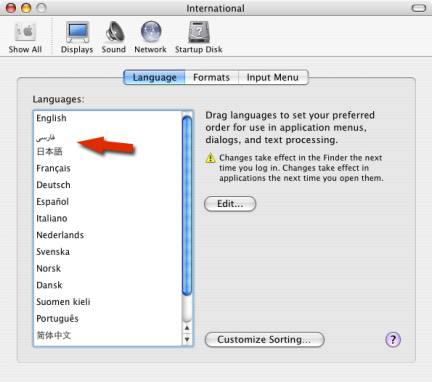
Farsi (any other languages you enabled) will be at the bottom of the standard languages. If you disabled other languages, you will see fewer language options. You may now re-order the languages according to your preference by clicking and then dragging the language to the desired position. You should put your default language at the top.
This is what the window will look like after you have moved “Farsi.”
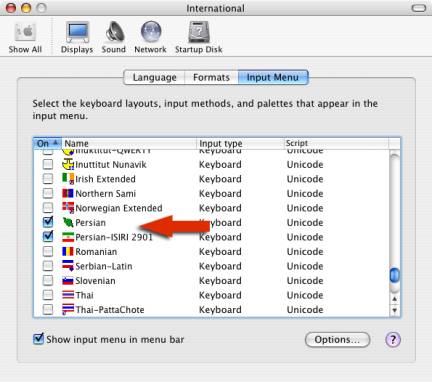
After you have re-ordered the languages to your preference, you should click on “Show input menu in menu bar.” This will place the language menu to your menubar and place it in the upper right hand corner of the screen.
Next, activate the “Persian” and “Persian-ISIRI 2901” keyboards under the “Input Menu” and then click on “Options.”
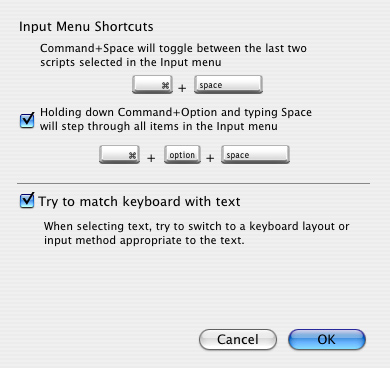
After you have completed the above steps, click on “Options” in the lower right hand corner of the screen. This will show you how to toggle between the various languages you have installed. By default, the options will be activated. Click “OK” when you have finished reviewing the options.